Introduction
Most people who start tracking gym progress photos give up within a month. Not because progress stalls, but because finding, comparing, and making sense of photos stored in a generic camera roll is a frustrating experience.
Your camera roll stores photos in one long chronological list. There is no way to filter for just your back photos, or just your leg photos. Comparing two photos means opening one, memorizing it, navigating to another, and hoping your memory holds. When you have hundreds of gym photos from a year of training, this system completely falls apart.
A gym image tracking app solves this by treating progress photos as structured data, not just files. Each photo gets tagged to a specific body part. You can filter your entire library instantly. Any two photos can be placed side by side at full screen in seconds. And your entire collection backs up alongside your workout data.
This guide covers what to look for in a gym image tracking app, why standard photo apps fail at this job, and how Sleet’s Progress Gallery turns photo tracking from a frustrating chore into a system that actually shows you your transformation.
Raaj’s take: I went back through my own camera roll before building this feature and counted 214 gym photos taken over 11 months, with zero tags and no folders. Finding a matching “before” shot for a recent back photo took almost four minutes of scrolling. That single frustration is the entire reason Progress Gallery tags photos by body part instead of just date, it’s a problem I had personally, not a feature we guessed users might want.
Why Standard Camera Apps Fail at Gym Image Tracking
A camera roll is built for general photo storage. It organizes everything by date, and that is it. For casual photography, this works. For tracking body composition changes across specific muscle groups over months or years, it is nearly useless.
Here is what happens in practice when you use a camera roll for progress tracking:
You take front, side, and back photos in August. You do the same in September. And again in October. Now you want to compare your back development between August and October. You have to scroll past three months of photos, find the right session, remember which photos were the back shots, open one, memorize it, close it, scroll to find the matching October shot, and open that. At no point are the two photos visible at the same time.
Multiply this by six body parts, twelve months, and multiple angles per session. The camera roll becomes an archive of photos you never look at because comparing them is too time-consuming.
The result is that you lose the single most motivating outcome of progress photography: seeing a genuine side-by-side comparison of where you started and where you are now.
What a gym image tracking app does differently:
| Feature | Camera Roll | Gym Image Tracking App |
|---|---|---|
| Organization | Chronological only | Tagged by body part |
| Filtering | None | Filter by muscle group instantly |
| Side-by-side comparison | Manual and awkward | Built-in at full screen |
| Search | By date only | By body part + date |
| Workout data connection | None | Paired with your training log |
| Backup | Device backup only | Included in workout data export |
What to Look for in a Gym Image Tracking App
Not all fitness photo apps are built the same way. These are the features that separate a useful gym image tracking app from one that adds friction without solving the core problem.
Body-Part Tagging
This is the foundational feature. Every photo you add should be tagged to a specific body part: chest, back, shoulders, arms, legs, glutes, or full body at minimum. Without this tag, you are back to a chronological list.
Body-part tagging lets you answer the question “what has my back looked like over the past six months?” with a filter, not with a scroll.
Filter by Muscle Group
Tagging is only useful if the app lets you filter by those tags. A proper gym image tracking app lets you tap a muscle group and instantly see only the photos tagged to that area, sorted by date.
This is the difference between a searchable database and a shoebox of photos.
Side-by-Side Comparison Mode
The most powerful feature in any gym photo tracking app. Select two photos from the same body part, taken at different dates, and view them simultaneously at full screen.
Side-by-side comparison makes progress visible in a way that even high-quality individual photos cannot. Small changes in muscle roundness, separation, and body fat distribution that are difficult to notice in a single photo become obvious when the same pose from two different dates is placed directly next to each other.
Capture and Import Support
A gym image tracking app should let you both capture photos directly inside the app and import existing photos from your camera roll. If you have already been taking progress photos on your phone, you should not have to retake them to start using the app.
Backup and Restore
Progress photos represent months or years of consistent effort. They should be backed up alongside your workout data, not left in a device camera roll that vanishes if you lose or change your phone.
Sleet’s Progress Gallery: A Complete Walkthrough
Sleet is a free Android gym tracker with a full-featured Progress Gallery built specifically for body composition tracking. Here is exactly how it works.
Adding Your First Progress Photo
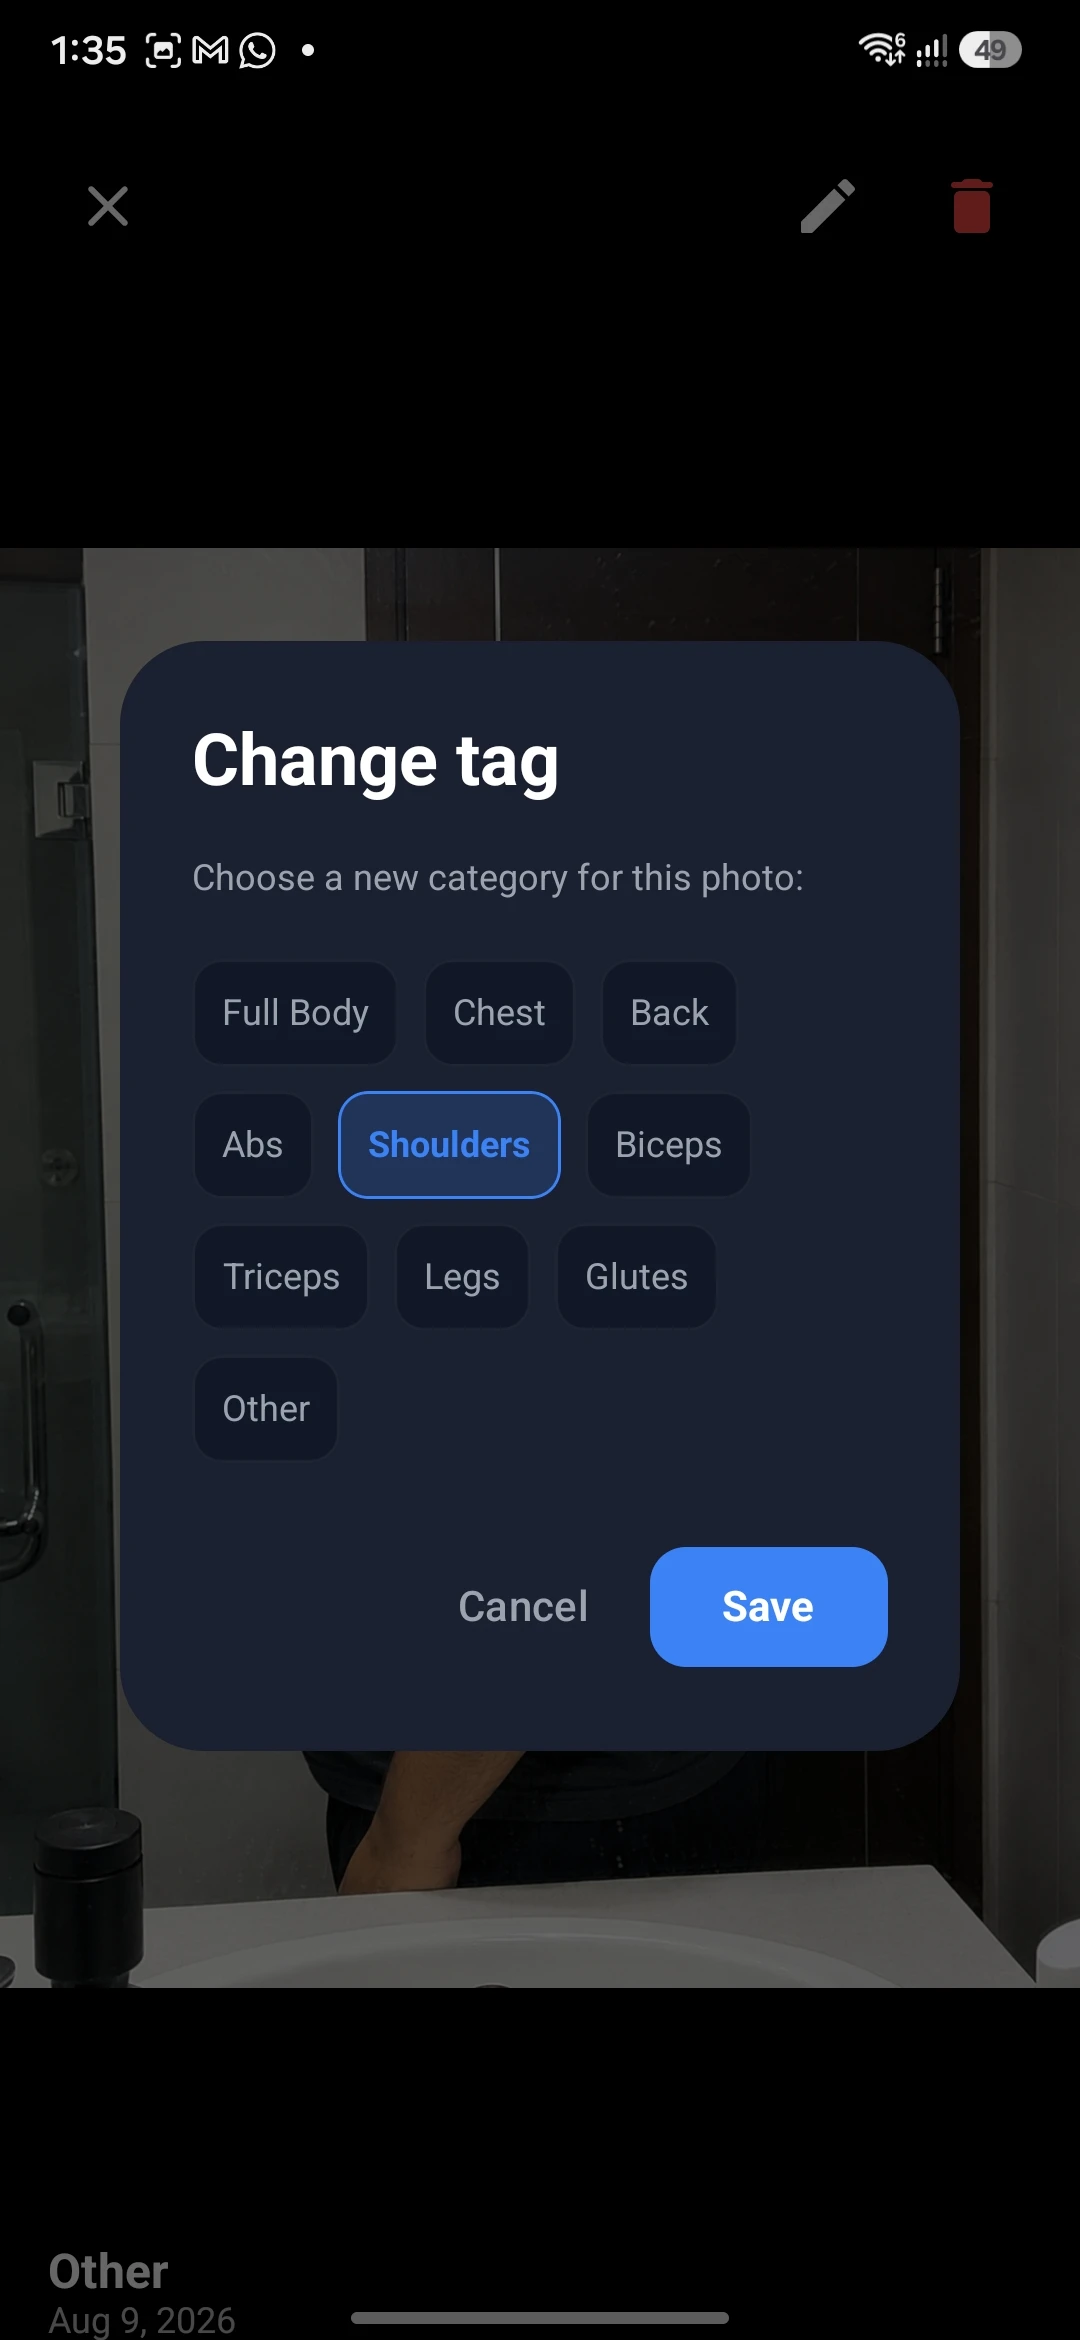
When you open the Progress Gallery in Sleet, you can add a photo in two ways:
- Capture directly in the app, opens the camera so you can take a photo immediately
- Import from camera roll, select an existing photo from your device
After selecting or capturing a photo, you tag it to a body part. Sleet uses the same 10 muscle group categories as the workout logging section of the app: Chest, Back, Shoulders, Biceps, Triceps, Legs, Glutes, Core, Full Body, and Cardio. Select the one that matches your photo and save.
The photo is now stored in your gallery with that tag permanently attached.
Browsing Your Gallery
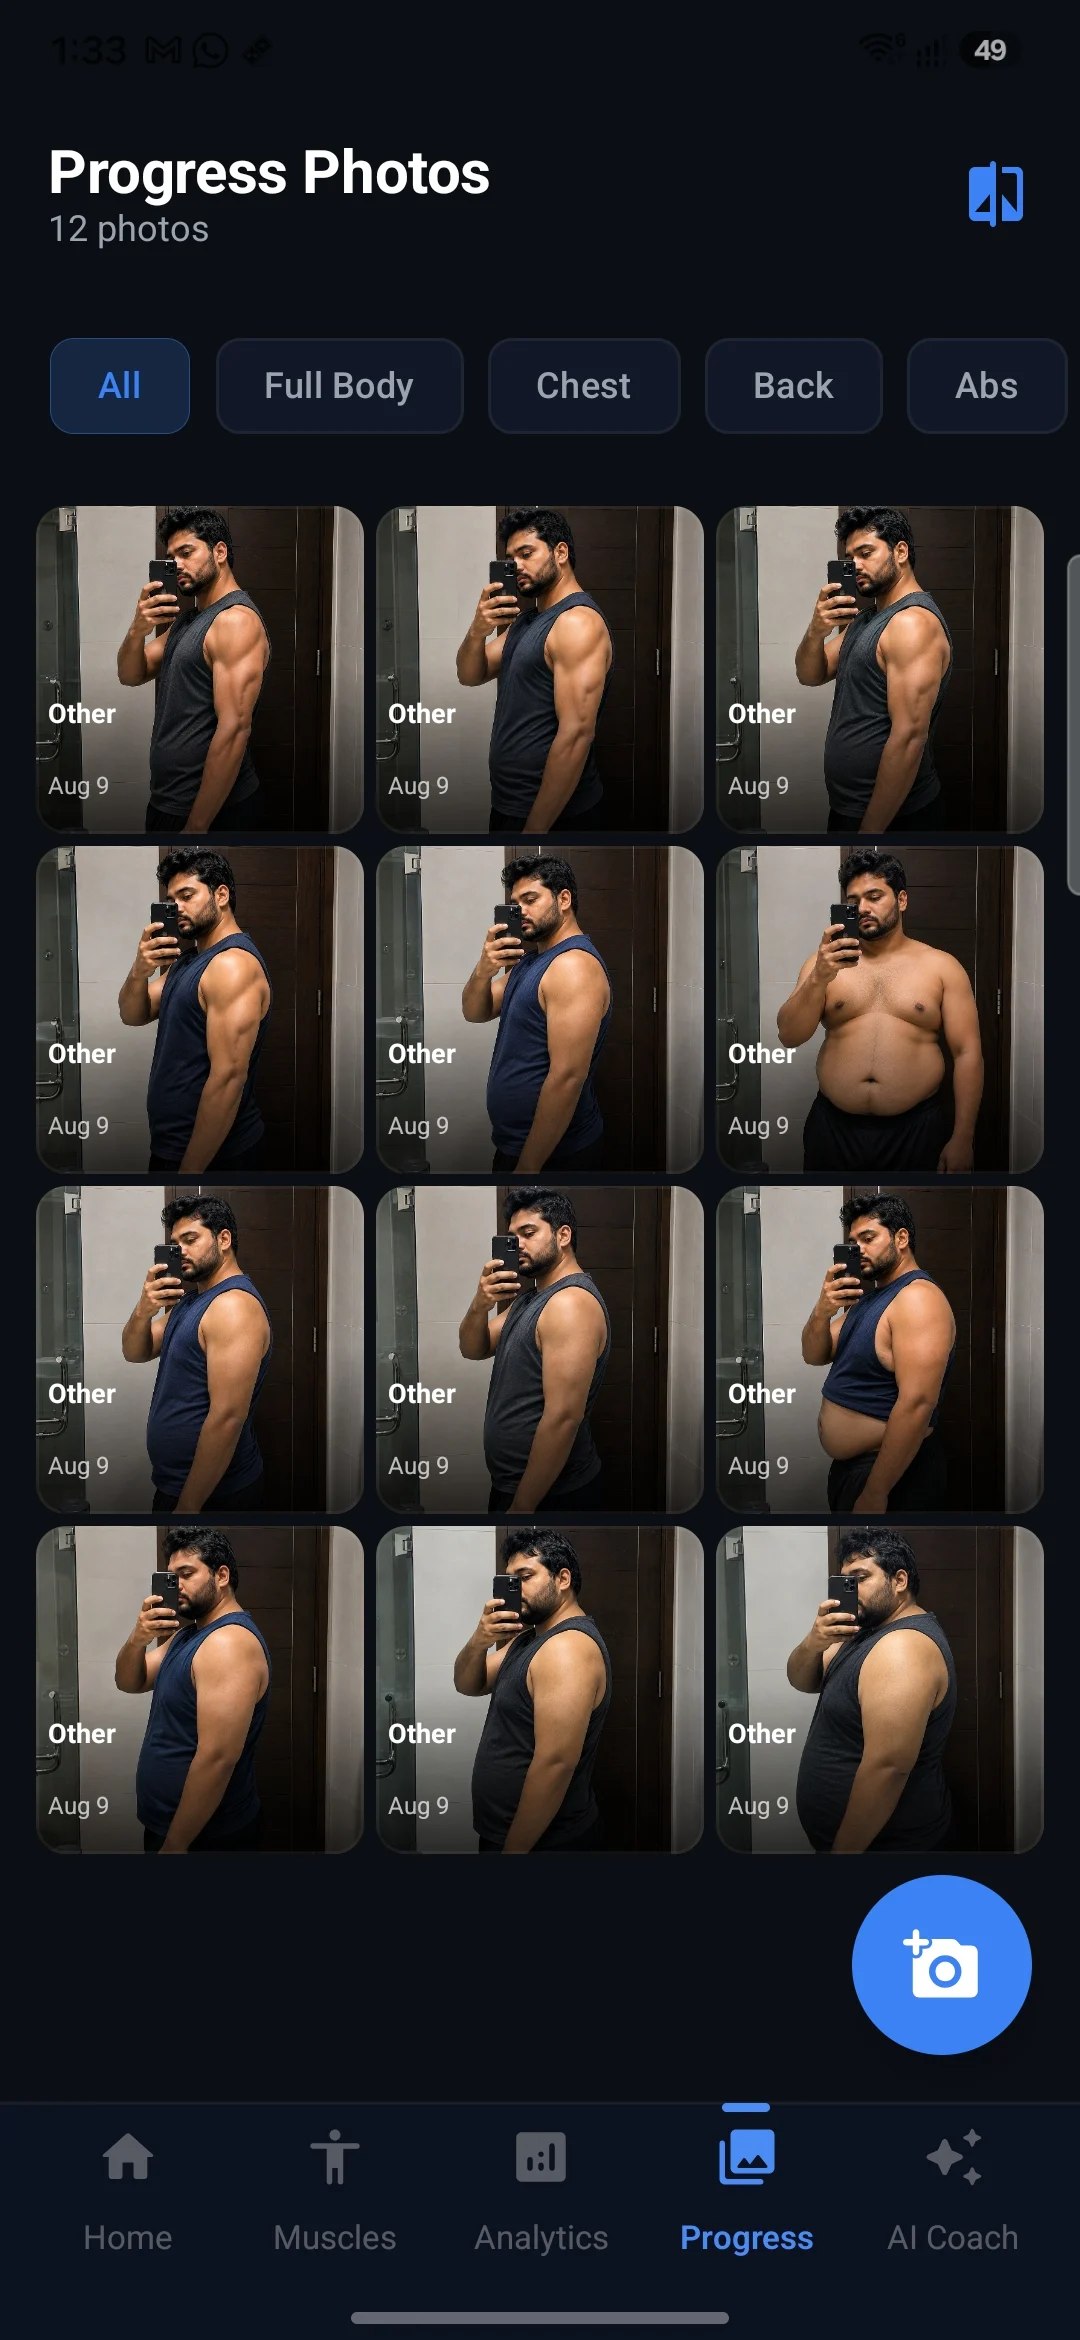
The main gallery view shows all your progress photos in a grid. Each photo displays its tag and date at a glance. You can scroll through the full collection here, or use the filter to narrow it down.
Filtering by Body Part
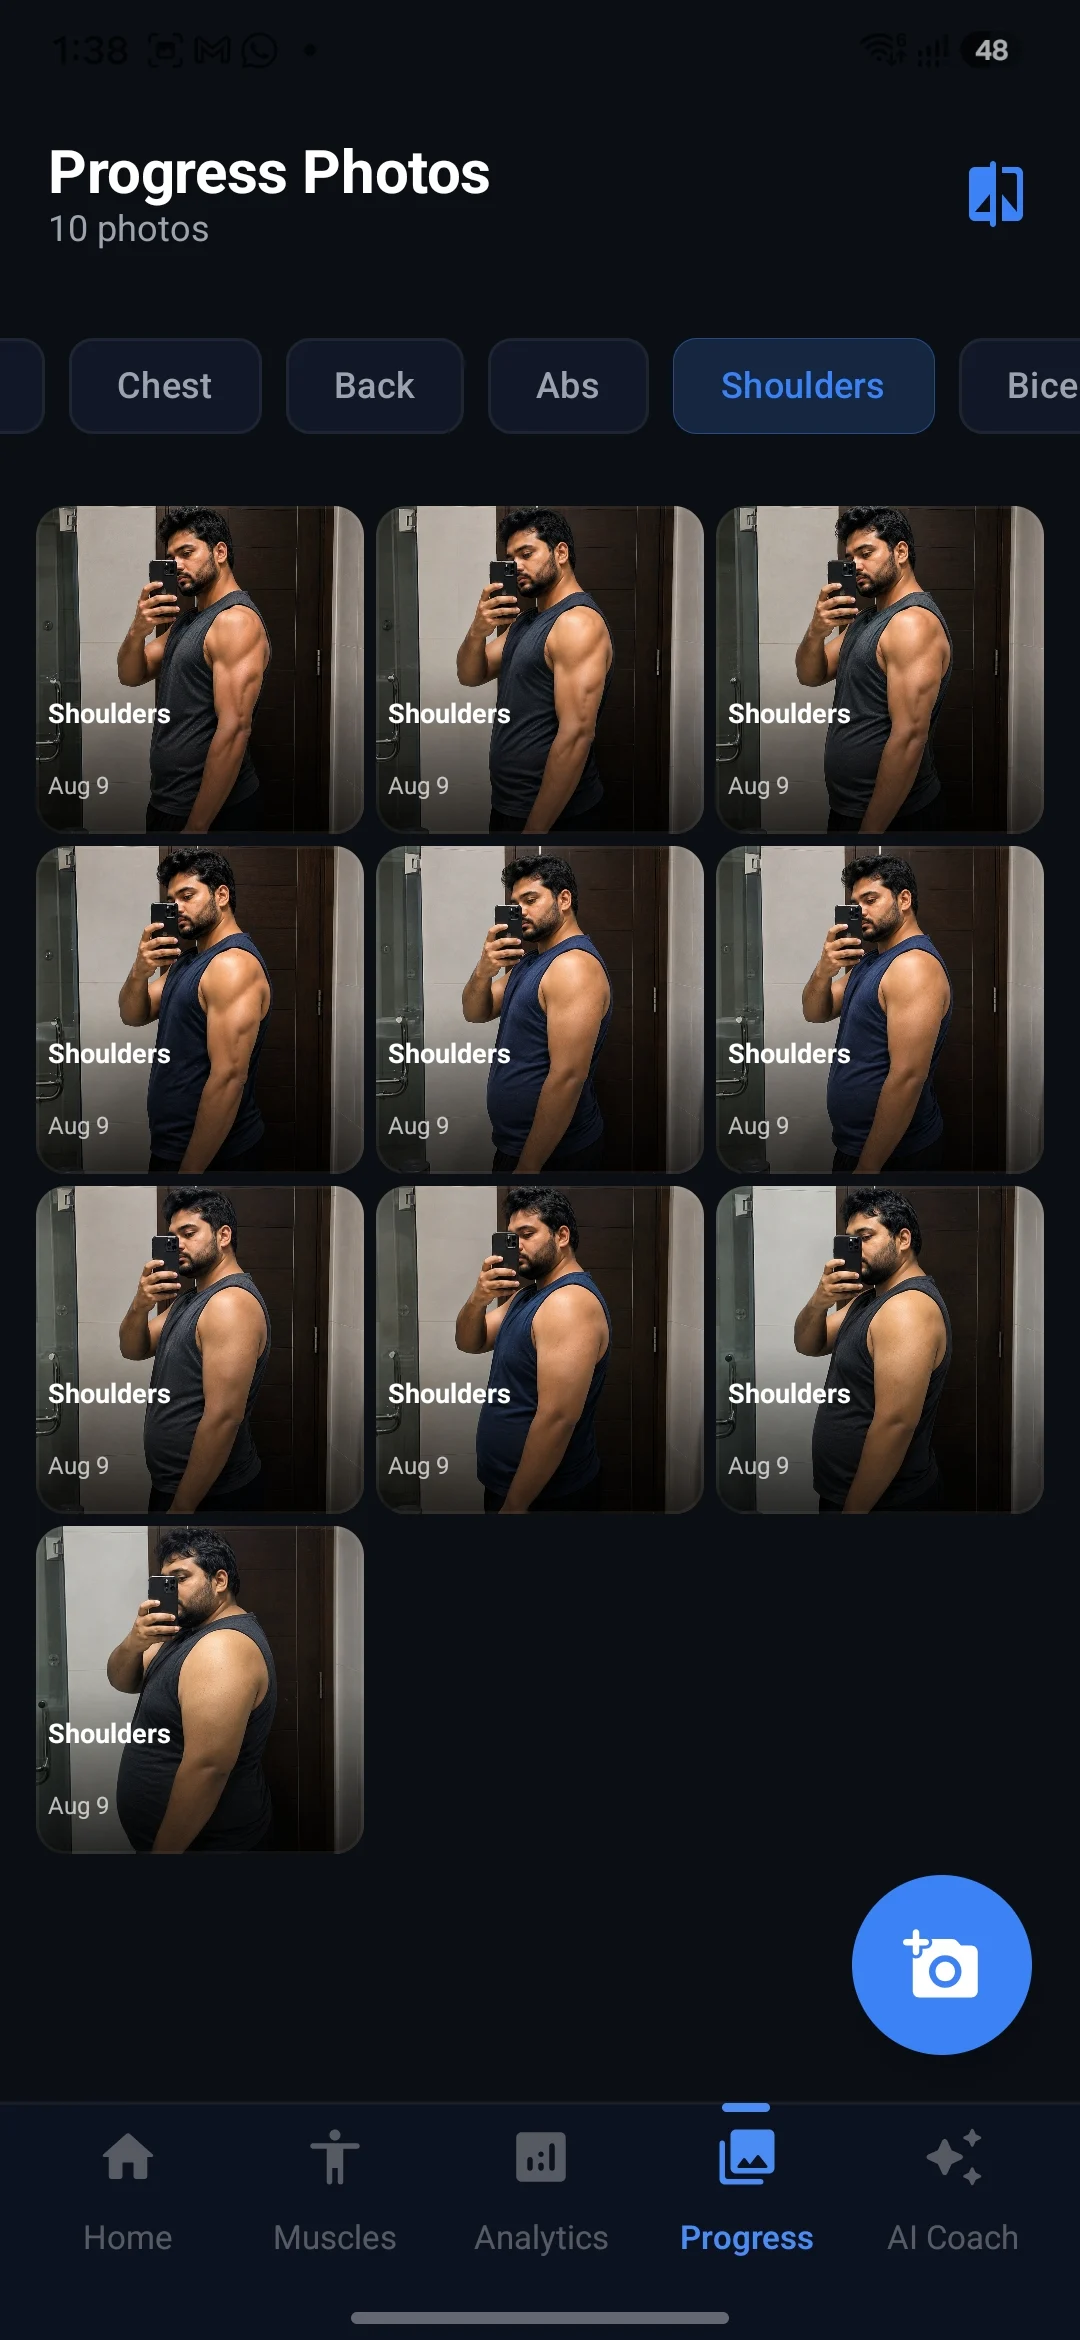
Tap any body part from the filter bar at the top of the gallery. The view instantly updates to show only photos tagged to that muscle group, sorted by most recent first.
This is where the body-part tagging pays off. Tap “Back” and you see every back photo you have ever taken, in order, without any noise from chest photos, leg photos, or anything else. Finding the right photo for a comparison takes seconds, not minutes.
Full-Screen View
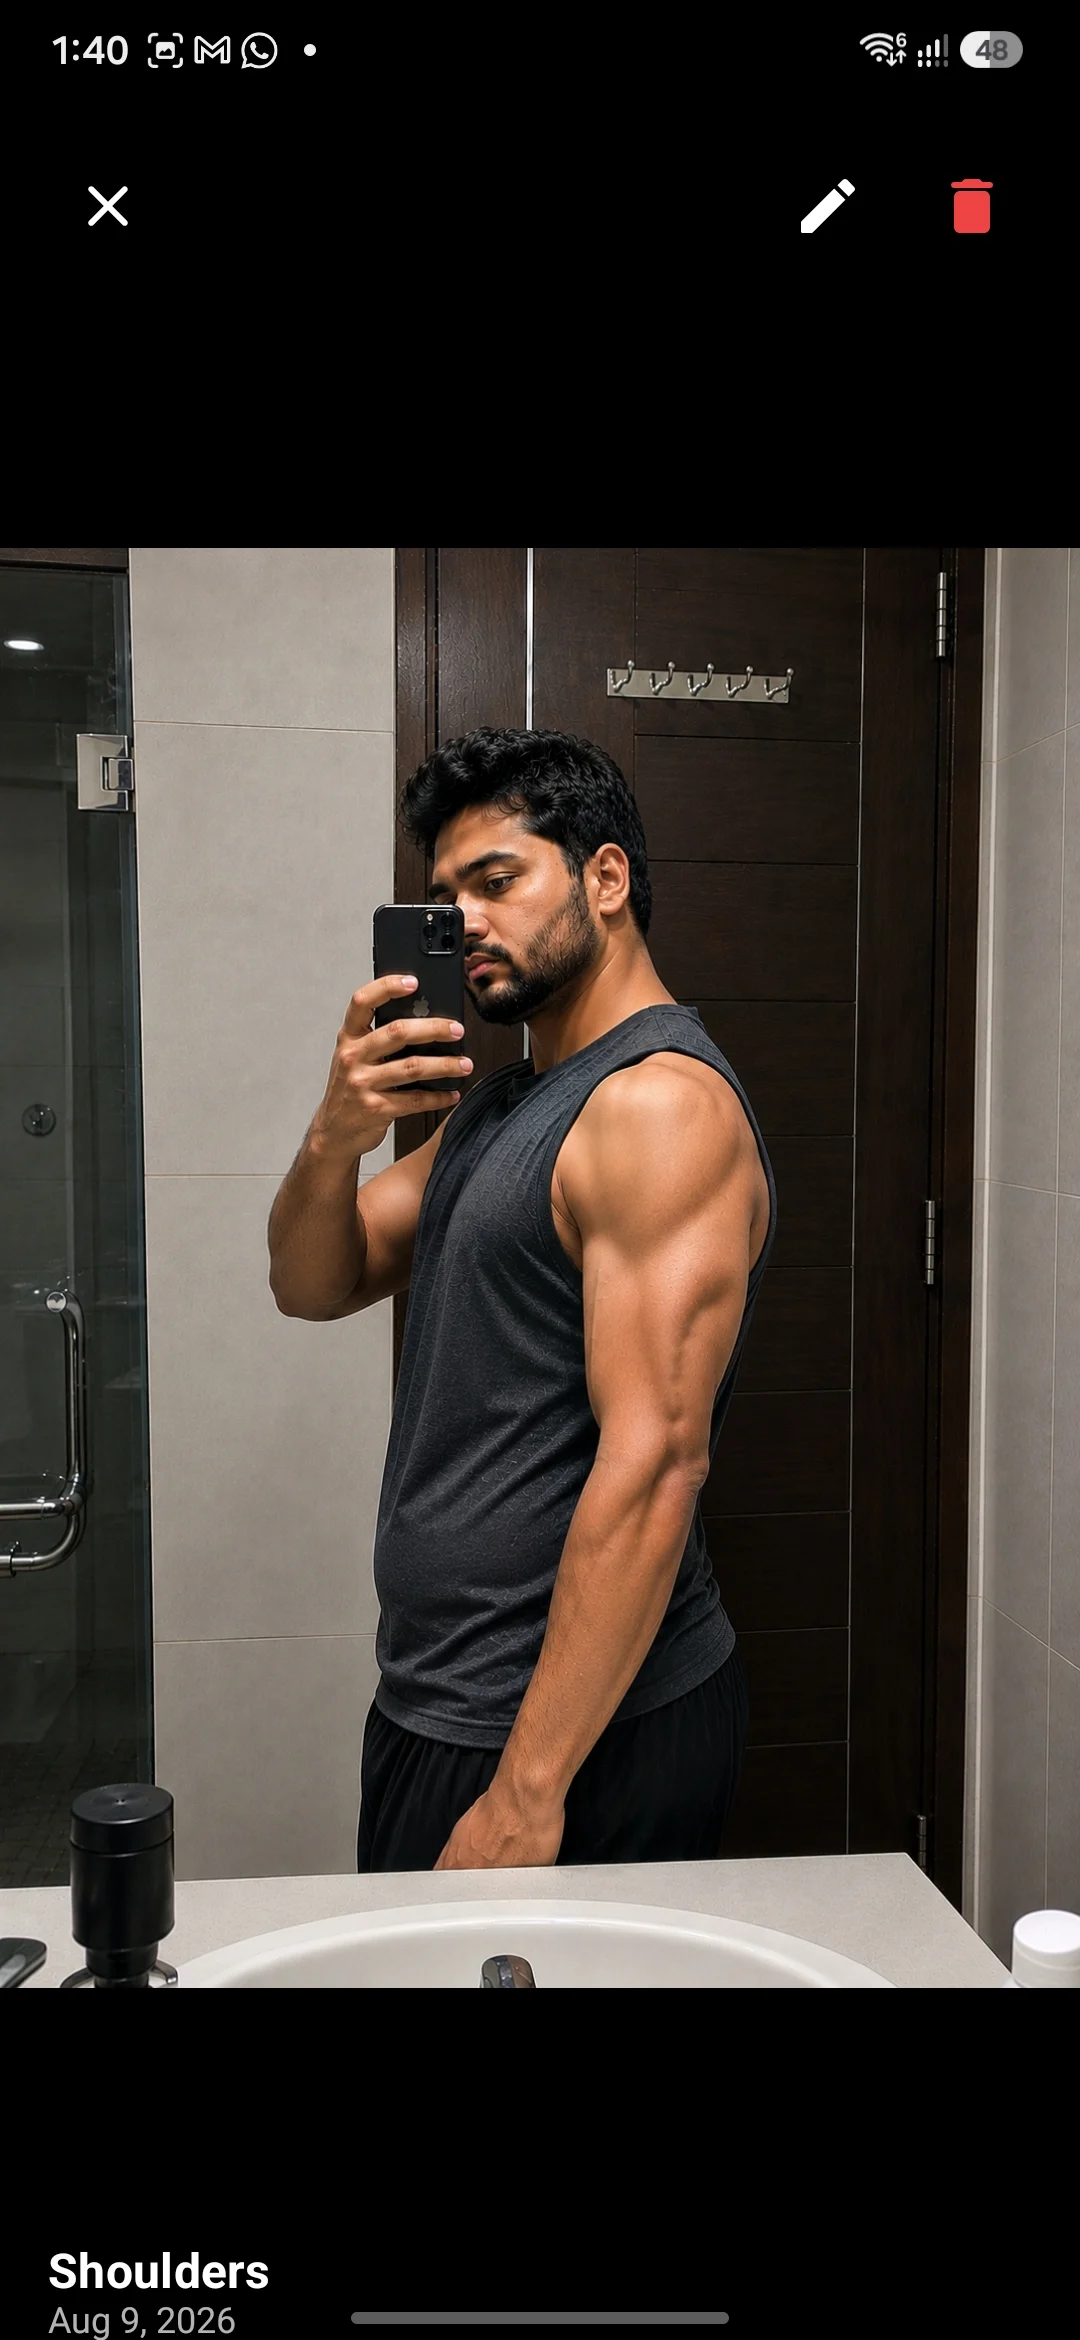
Tap any photo to open it in full-screen. This gives you a clear, unobstructed view of the photo at maximum size on your device screen, without the grid thumbnails and interface elements competing for attention.
Side-by-Side Comparison
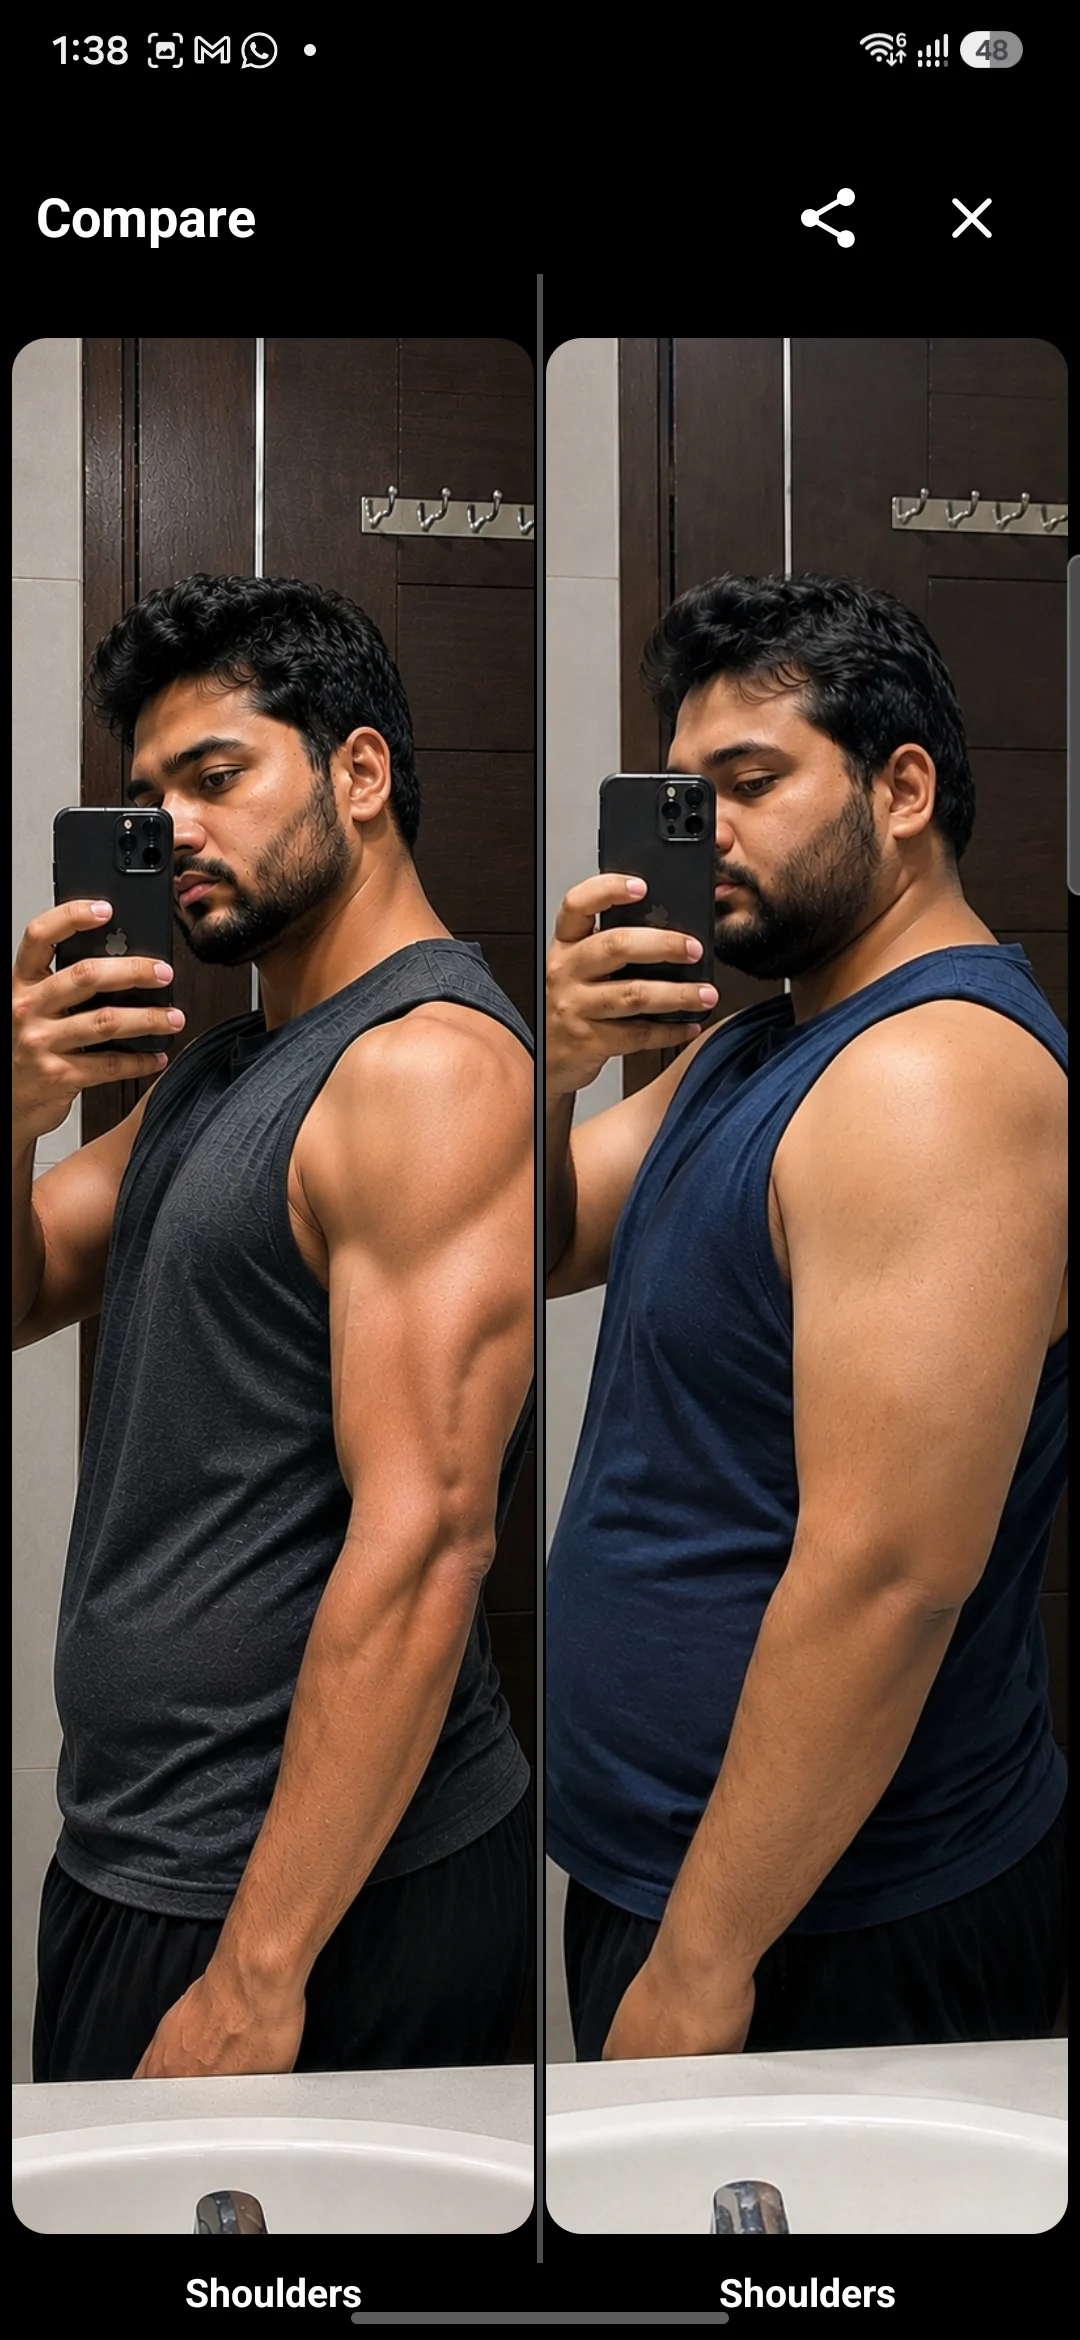
This is the feature that makes the Progress Gallery worth using. Select two photos from your gallery and tap the compare button. Sleet opens both photos simultaneously in a split-screen layout, filling the entire screen.
To use this effectively:
- Filter to a single body part first
- Select one older photo and one recent photo of the same pose type
- Open the comparison
The difference between the two photos is visible immediately. Muscle definition changes, body fat shifts, and postural improvements that looked minimal in individual photos become obvious when you can see them side by side at the same time.
For a detailed guide on which angles to use, how far apart to space your comparison photos, and what visual changes to look for, see the complete guide to tracking gym progress pictures.
How to Set Up a Progress Photo System That Works With Sleet
Having the right app is only half the equation. The system around it determines whether the photos are useful for comparison or just a collection of inconsistent images that cannot be meaningfully compared.
Take Photos on a Fixed Schedule
Every four weeks is the best default. Daily and weekly photos introduce too much noise from water retention and lighting variation. Monthly photos give your body enough time to accumulate visible changes.
Set a recurring reminder in your calendar. The day you log a progress photo session should feel as routine as a workout day.
Standardize Every Variable
Progress photos are only useful if they can be compared accurately. The variables that need to stay constant across every session:
- Time of day: morning, before eating or drinking, is the most consistent
- Location: the same wall or background every time
- Lighting: natural daylight from directly in front of you, or a ring light at eye level
- Distance from camera: mark your floor position with a small piece of tape
- Clothing: the same minimal, fitted clothing in a neutral color every session
- Pose type: same relaxed and flexed poses in the same order
Change any one of these and you introduce a variable that makes the comparison inaccurate. Lighting alone can make the same physique look 10 to 15% more or less defined between shots.
Tag Photos Immediately After Taking Them
Do not take a batch of photos and plan to tag them later. Tag each photo as you add it to Sleet while the context is fresh. It takes three seconds per photo and ensures your gallery stays organized without any sorting work later.
Use the Filter Before Every Comparison
Every time you want to compare photos, start by filtering to the specific body part you are reviewing. Never compare a full-body photo to a chest photo, or a flexed photo to a relaxed one. The filter keeps your comparison set clean and honest.
Connect Your Photo Progress to Your Workout Log
Sleet stores your progress photos alongside your full workout history. When you see a visible change in your back development in a side-by-side comparison, you can cross-reference your training log from the same period to identify which exercises and which progression drove that change.
This is the feedback loop that makes tracking genuinely useful: you see the visual result in your photos, you identify the training input in your log, and you repeat what worked. Most lifters who use photos alone or a log alone never complete this loop. Having both in one app makes it automatic.
Gym Image Tracking vs. Body Measurement Tracking
Progress photos and body measurements track related but different things. Understanding what each one shows helps you use both correctly.
| What You’re Tracking | Best Method |
|---|---|
| Overall body weight change | Scale |
| Circumference changes (waist, chest, arms) | Tape measure |
| Muscle definition and separation | Progress photos |
| Posture and structural changes | Progress photos |
| Body fat vs. muscle composition | Progress photos + calipers |
| Strength improvement | Workout log |
| How all of these connect | Sleet (combines log + photos) |
Body measurements tell you that something changed in size. Progress photos tell you what it looks like and where the change happened visually. Strength numbers in your workout log tell you what drove the change. All three together give you a complete picture.
Common Mistakes With Gym Image Tracking Apps
Using the Camera Roll as Your Default
The camera roll is convenient but not functional for this purpose. The organization problem compounds over time. Start using a dedicated gym image tracking app from your first progress photo session so you never have to migrate a disorganized archive later.
Inconsistent Tagging
If you sometimes tag a photo as “Back” and sometimes forget and leave it untagged, your filter stops being reliable. Make tagging a required step every single time you add a photo. Sleet makes this part of the add-photo flow so you cannot skip it.
Comparing Photos With Different Variables
The most common comparison mistake is taking a pumped, well-lit evening photo and comparing it to a morning photo taken six months ago. The two photos look dramatically different due to variables that have nothing to do with actual progress. Always compare photos taken under the same conditions.
Not Backing Up the Library
Progress photos are not replaceable. If your phone is lost, damaged, or reset, an unbackedup photo library is gone permanently. Use Sleet’s Backup and Restore feature to export your entire data set, including progress photos, to your Documents folder at regular intervals.
Reviewing Photos Too Frequently
Checking your progress photos every few days encourages comparison of images taken too close together to show meaningful change. Schedule a photo review session once a month minimum, and look at comparisons that span at least eight to twelve weeks. That is when visual progress becomes undeniable.
Sleet Progress Gallery: Feature Summary
| Feature | Sleet Progress Gallery |
|---|---|
| Photo capture in-app | Yes |
| Import from camera roll | Yes |
| Body-part tagging | Yes (10 categories) |
| Filter by muscle group | Yes |
| Full-screen view | Yes |
| Side-by-side comparison | Yes |
| Workout log integration | Yes (same app) |
| Backup included | Yes (ZIP export with full data) |
| Platform | Android |
| Cost | Free |
Why Sleet Is the Only Gym Image Tracking App That Also Logs Your Training
Most dedicated photo tracking apps are exactly that: photo apps. They organize images well but have no connection to your actual training data. Sleet is a complete gym tracker that happens to include a best-in-class photo gallery.
This matters because the most valuable insight from progress tracking comes from the combination of your photos and your training log. Seeing your chest develop visually while also watching your bench press go from 60 kg to 90 kg over the same period gives you a complete picture of your progress that neither tool provides alone.
Sleet also includes:
- AI Coach: a conversational AI that reads your complete workout history and gives you personalised advice (free)
- AI Routine Planner: generates a full personalized weekly plan based on your actual performance data, including plateau detection and recovery scoring (free)
- Voice Logging: log sets hands-free during your workout by speaking instead of tapping (free)
- Plateau Detection: automatically flags exercises where your progress has stalled
- Muscle Imbalance Detection: identifies push/pull and left/right imbalances before they become injuries
- Analytics Dashboard: workout streaks, volume per muscle group, experience score, and strength trends over time
The Progress Gallery fits into this ecosystem as the visual layer of a complete tracking system. Your workouts are logged, analyzed, and coached. Your transformation is documented, organized, and comparable. Everything is in one place, and everything is free.
Sleet is available on Google Play.
How to Get Started With Gym Image Tracking in Sleet
Getting your progress photo system set up takes about ten minutes:
- Download Sleet from Google Play and create an account with your phone number
- Open the Progress Gallery from the main navigation
- Add your first photos, capture now or import existing photos from your camera roll
- Tag each photo to its body part when prompted
- Repeat every four weeks from the same location, at the same time, in the same lighting
- Use the filter to view a specific body part when you want to do a comparison
- Select two photos and open the side-by-side comparison to see your actual progress
For everything you need to know about the photography side of this, including exact lighting setup, distance from camera, time of day, what to wear, and how to pose, read the complete guide to tracking gym progress pictures.
A gym image tracking app only works if the photos you take are consistent enough to compare accurately, and if the app makes comparison fast and easy enough that you actually do it. Sleet’s Progress Gallery handles the second part. The consistency is up to you, but once you have a system, the side-by-side comparisons do the rest.